Difference between revisions of "BackupInstructions"
From PLplotWiki
m |
m |
||
| Line 3: | Line 3: | ||
* ssh into miscdebris.net | * ssh into miscdebris.net | ||
* archive the whole directory with | * archive the whole directory with | ||
| − | zip -r plplot_wiki.zip | + | zip -r plplot_wiki.zip plplot_wiki |
* ftp the zip file | * ftp the zip file | ||
Revision as of 11:17, 5 October 2006
File backup
- ssh into miscdebris.net
- archive the whole directory with
zip -r plplot_wiki.zip plplot_wiki
- ftp the zip file
Database backup
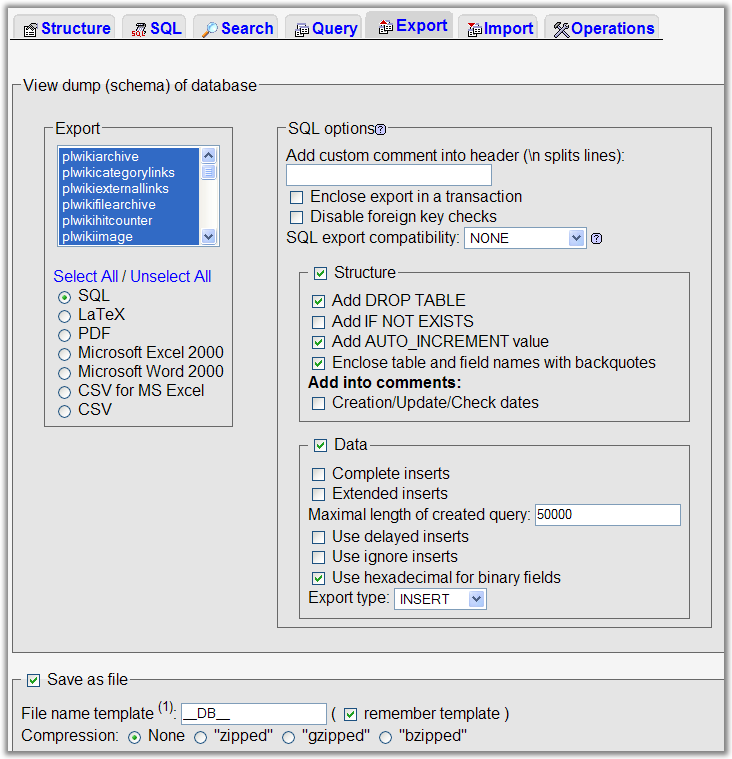
- Go to http://mysql.miscdebris.net, login and choose the plplot_wiki database.
- Click the 'Export' tab on the top set of tabs.
- Look at the left box at the top of the Export section. Choose only those tables that correspond to the plplot_wiki database (i.e. all tables with a "plwiki" prefix.
- Ensure that the SQL button is selected too.
- Tick the following boxes in the SQL section: Structure, 'Add DROP TABLE', 'Add AUTO_INCREMENT' and 'Enclose table and field names with backquotes'
- Also tick the Data box and in the Data section 'Use hexadecimal for binary fields'.
- Tick the 'Save as file' option, and leave the template name alone.
- For now, select 'None' for compression.
- Now click 'Go' and you should be prompted for a file to download.
These instructions are taken from these two sources:
